
Have you ever noticed your golf game slipping because your grip feels slippery or worn out? It’s frustrating, isn’t it? Don’t worry—you’re not alone. Over time, golf club grips wear down, making it harder to control your swing and maintain accuracy.
The good news? Learning how to regrip golf clubs is simpler than you think and can dramatically improve your performance on the course. Plus, regripping your clubs at home saves time and money while giving you a sense of pride every time you step up to play.
I’ll walk you through a simple DIY process to regrip your clubs. Whether it’s your first attempt or you’re a seasoned pro looking for a quick refresher.
Equipment List
Here’s a complete list of tools and materials you’ll need to regrip your golf clubs:
- Replacement Grips: Choose the CHAMPKEY Grips that suit your playing style. You can find various options like rubber, corded, or hybrid grips.
- Hook Blade or Utility Knife: These tools are essential for removing old grips.
- Double-Sided Tape: This secures the new grip to the shaft.
- Water-Based Solvent or Grip Solvent: Helps slide the new grip into place without tearing.
- Straight Razor (optional): Razor is Useful for precise tape removal.
- Torch (optional): For gently warming old tape to make removal easier.
- Trash Can Setup: To catch any mess during the process.
- Towel: For cleanup.
- Alignment Tools: Optional but helpful for ensuring proper graphics alignment on the grip.
Pro Tip: If you don’t have grip solvent, household items like soapy water or rubbing alcohol can work as substitutes. However, professional solvent ensures the best results.
Step-by-Step Instructions
Now that you’ve gathered your tools, it’s time to get started. Follow these steps for a flawless regripping experience.
Step 1: Remove the Old Grip
Start by securing your golf club on a flat surface.
- Use a hook blade or utility knife to cut down the length of the old grip. Be careful to avoid scratching the shaft.
- Peel away the old grip like you would when peeling a potato. Discard the old grip into your trash can setup.
- If there’s old double-sided tape left on the shaft, remove it using a straight razor or gently warm it with a torch to make the process easier.
- Wipe the shaft clean to ensure no residue remains.
Step 2: Prepare the Shaft
- Next, prepare the shaft for the new grip installation.
- Wrap the shaft’s upper portion with double-sided tape, leaving a bit hanging over the butt end of the grip. Fold the excess inward.
- Ensure the tape covers the area evenly, avoiding any overlaps that might create bumps under the grip.
Step 3: Apply Solvent
- Now it’s time to coat the grip and tape for easy application.
- Pour a generous amount of water-based solvent inside the new grip. Cover the open end with your hand and shake it to ensure the solvent coats the inside.
- Pour the excess solvent over the taped area on the shaft, letting it drip into your trash can setup.
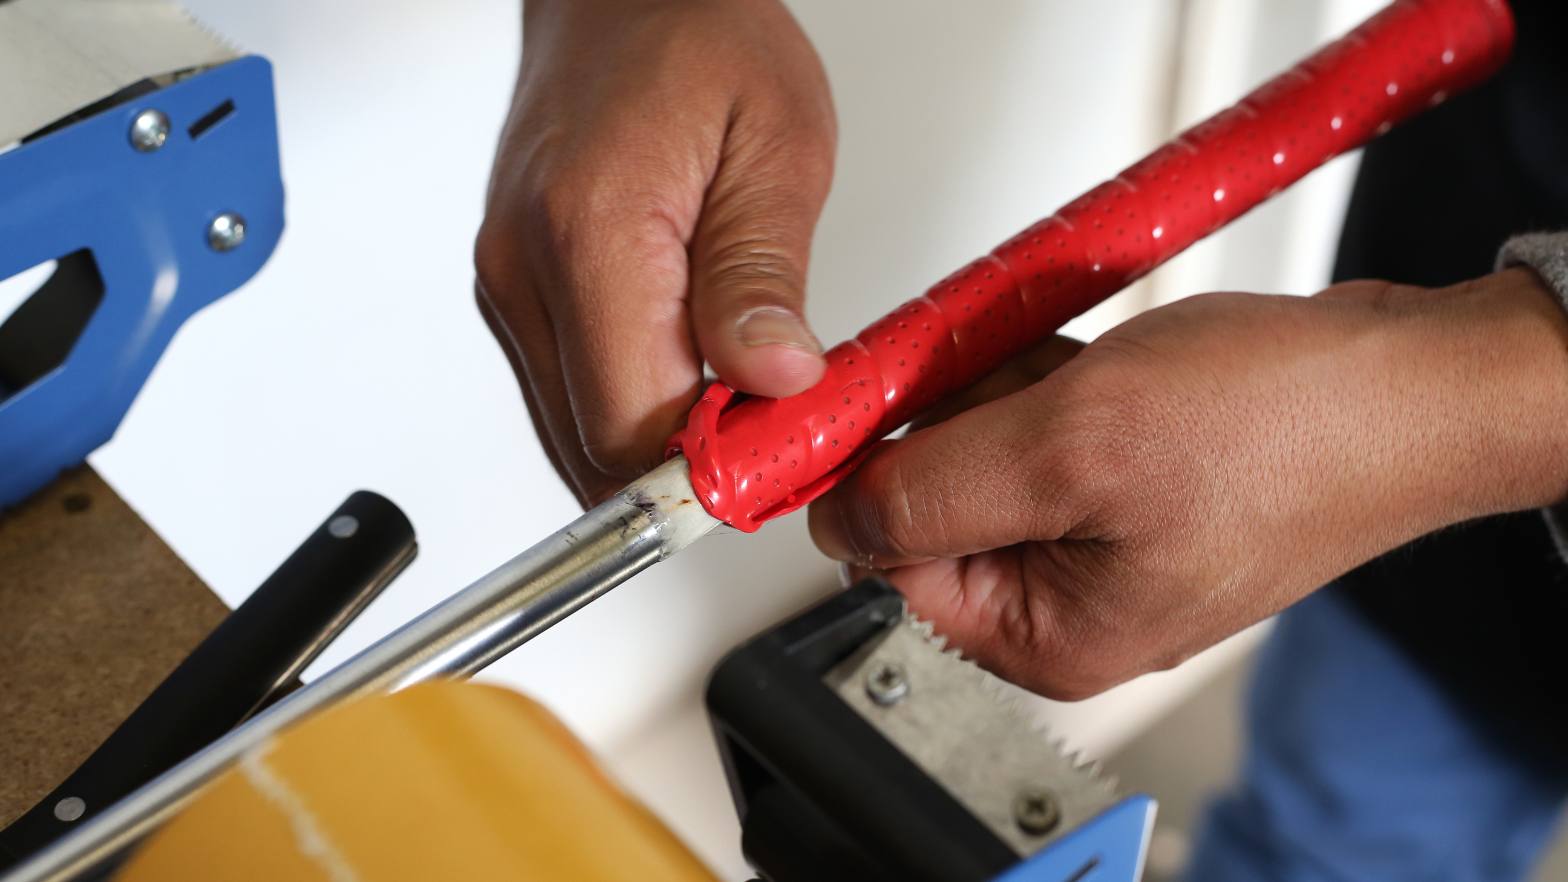
Step 4: Install the New Grip
This is where things get exciting!
- Align the new grip’s opening with the shaft and slide it on in one smooth motion. The solvent coating helps the grip glide into place effortlessly.
- Ensure the grip’s graphics alignment matches your preferred setup. Adjust it quickly before the solvent dries.
Step 5: Final Adjustments
Finally, fine-tune the alignment and let the grip set.
- Check for a square clubface by placing the club on a flat surface.
- Rotate the grip slightly, if needed, to achieve a proper grip position.
- Use a towel to clean off any excess solvent and allow the grip to dry for at least 24 hours before use.
Tips and Tricks
Regripping golf clubs doesn’t have to be intimidating. Here are some expert-approved tips to make the process even smoother:
Warm the Tape: If the old tape is stubborn, use a torch or hair dryer to loosen it.
Pinch and Rotate: While sliding on the new grip, pinch and rotate it gently for better control.
Check Alignment Early: Adjust the grip’s position before the solvent starts drying to avoid redoing the process.
Use a Door Jam for Alignment: Rest the club against a door jam to ensure the clubface is square.
Stock Up on Supplies: Always keep extra tape, grips, and solvent handy for future regripping sessions.
Suggestions & Variations
Looking to customize your clubs further? Here are some ideas:
Grip Options: Try experimenting with different textures and materials, such as corded grips for wet conditions or softer rubber grips for comfort.
Color Coordination: Choose grips that match your golf bag or attire for a personalized look.
Alternate Methods: If you’re out of grip solvent, try substitutes like hairspray or soapy water.
Professional Touch: Invest in alignment tools for consistent grip placement every time.
Bonus Tip: If you’re regripping for a specific season, consider using grips designed for winter or summer conditions.
Explore our golf club sets and enhance your game with top-quality drivers and bags. Don’t forget essentials like gloves, towels, markers, and a golf chipping net for improved practice and performance on the course.
FAQ Section
How often should I regrip my golf clubs?
Typically, you should regrip your clubs every 40 rounds or once a year, depending on usage and weather conditions.
Can I reuse old grips?
It’s not recommended. Old grips lose their tackiness and shape, which can affect your performance.
What’s the easiest way to remove old tape?
Using a straight razor or gently warming the tape with a torch makes removal much easier.
What if my grip doesn’t slide on easily?
Ensure you’ve used enough solvent coating and that the tape is evenly applied.
Can I use household items instead of professional tools?
Hairspray, rubbing alcohol, or soapy water can substitute for grip solvent in a pinch.
Do I need to let the grip dry completely before playing?
Allow at least 24 hours for the solvent to dry to ensure the grip stays secure.
What’s the benefit of regripping at home?
DIY regripping saves money, ensures personalized results, and gives you full control over your equipment.
Call to Action
Now that you know how to regrip golf clubs, why not give it a try? Trust me, it’s easier than you think, and the results will have you playing like a pro in no time. If you found this guide helpful, leave a comment below and share your experience.


Leave a Reply